With virtual reality (VR) going mainstream, through products like the HTC Vive and Oculus Rift, many game developers have become interested in creating new content for these devices. To develop VR content there are two game engines that stand out: Unreal Engine and Unity3D.
For the purpose of this article, I will develop a small VR demonstration (demo) using Unreal Engine. The goal is to implement a level, where the player can move freely and interact with objects by grabbing them or destroying them.
What is the Unreal Engine?
The Unreal Engine is a game engine created by Epic Games in 1998. It was first used to create the Unreal game and since then has been successfully used in a variety of other huge games (including Unreal Tournament, Bioshock, Mortal Kombat X, among others). This game engine provides two toolsets for programmers: the traditional C++ and a visual scripting system known as Blueprints that allows for rapid development of the game logic.
VR support was added in the 4th version, launched in 2012. The first supported device was Oculus Rift DK1. Currently, all major VR devices are supported.
Before March 2015, to develop games with this engine, it was necessary to buy a licence, but it subsequently became free of charge. The only condition is that all the profits generated from a game developed with Unreal, above $3,000 must pay a 5% royalty. [1]
Alternative
One alternative for creating VR games is Unity3D. Unity3D is a newer game engine and its primary focus is on mobile games thus presenting a very strong 2D component. Furthermore, given its popularity and versatility, the engine expanded to the desktop and VR content.
To create games in unity3D we can use C#, JavaScript or Boo. This game engine is also free to use as with Unreal.
For the purpose of this article, I chose to develop in Unreal Engine because the goal is to create a desktop game and make use of the most advance VR devices on the market. Also, Unreal Engine helps to create prototypes very quickly.
Why develop for VR?
In the past years, VR technology has evolved to approach new levels of immersion and life-like experiences. In this way, consumers have more reasons to get excited about playing in VR, as opposed to 3D and 2D. Therefore, there is an opportunity to create exciting VR content, and for that to happen the developers have to step up and create it.
From a development point of view, it has new challenges to overcome in the way players interact and experiment with different elements of the game. The mentioned challenges include narrative construction, audio setting, locomotion in-game, and many more.
Assuming that future games will be VR ready, we currently have a chance to change the gaming world and entertainment as we know them today.
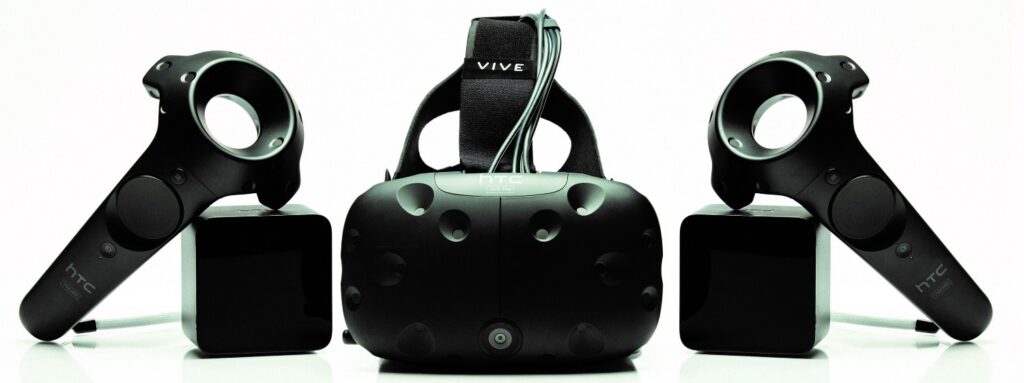
Headset choice
To identify the chosen hardware for our demo, I will state the reasons that led me to choose the HTC Vive:
- We want to develop it for desktop. (Automatically excludes mobile devices like Samsung GearVR, Google Daydream, …)
- HTC Vive allows roomscale (Oculus Rift will soon have this feature)
- HTC Vive already has two motion controllers (Oculus Rift touch must be bought separately)
Our goal is to make use of the motion controllers to interact with the objects, so the obvious choice is the HTC Vive.
VR setup
Having a high-end desktop and HTC Vive, everything can be set up and ready to use.
For that we need to:
- Make sure everything is connected in the right place. The full guide can be seen here [2].
- Install Steam and SteamVR.
- Make sure the firmware on all controllers and headset is updated.
- Run the “Room setup” and “Tutorial” to set up your roomscale and see if everything is working correctly.
- Download and install Unreal Engine [3] (Version: 4.13.2).
Now we are ready to start our demo.
Demo implementation
Before starting the development of our demo, is important to have some previous background knowledge about working with Blueprints.
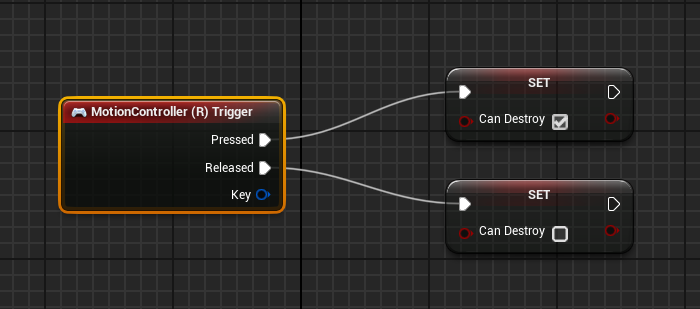
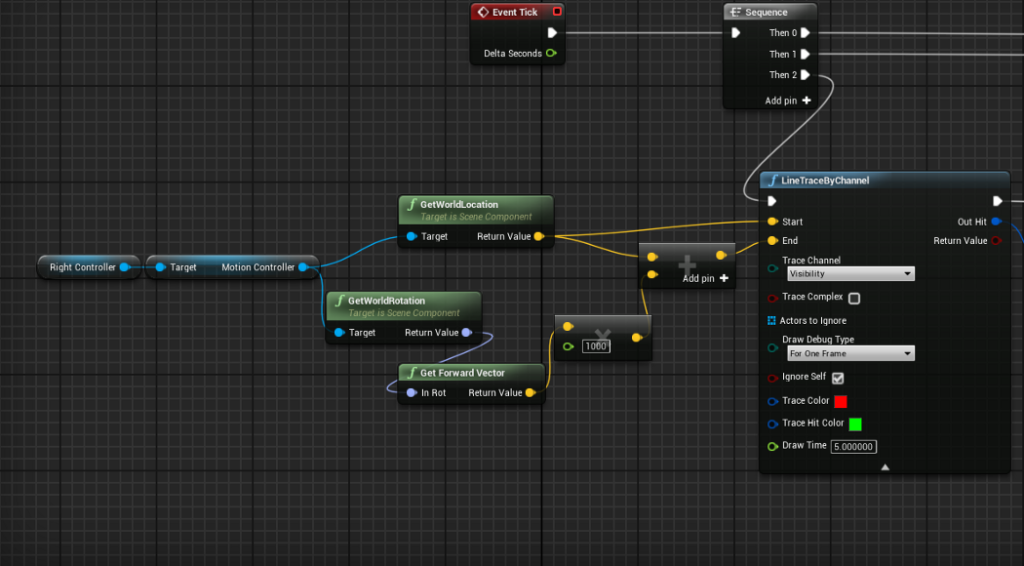
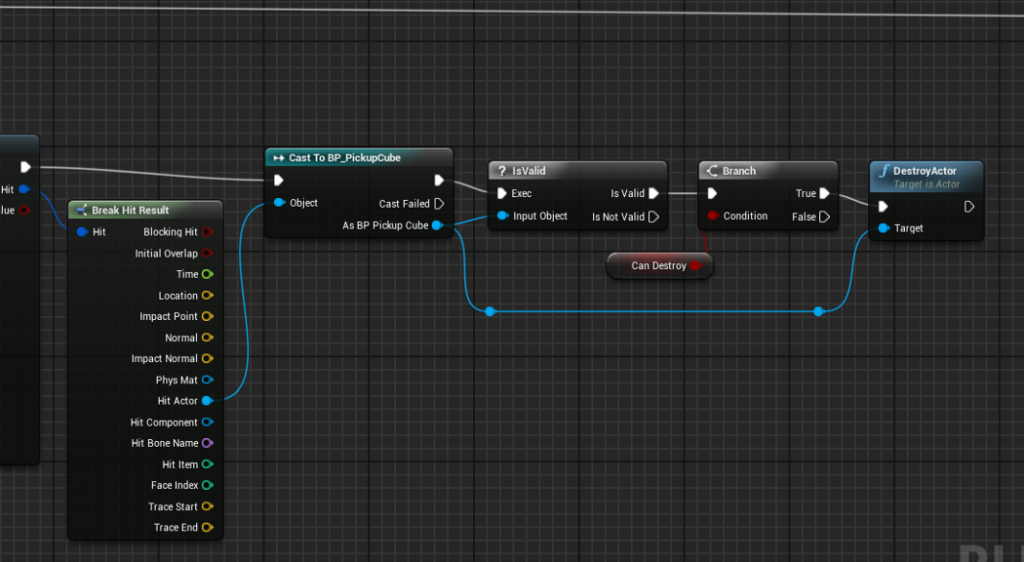
The following section shows the step-by-step process of how to create a new project, set up a level and create some simple game logic so we can point to an object and by pulling the trigger, destroy it.
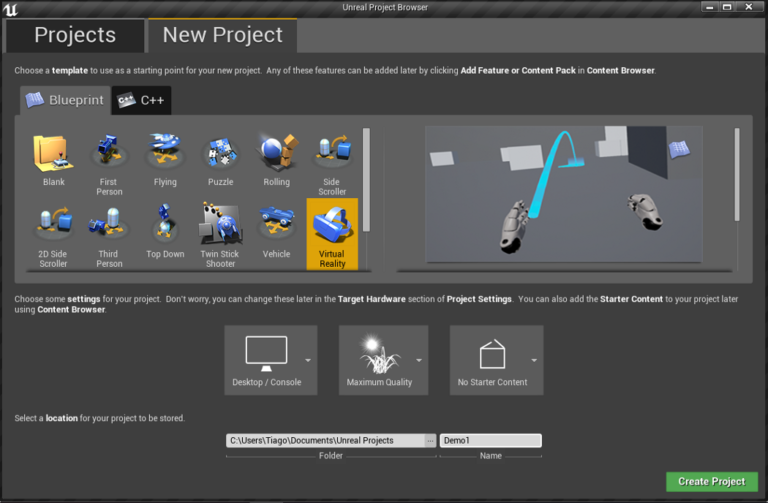
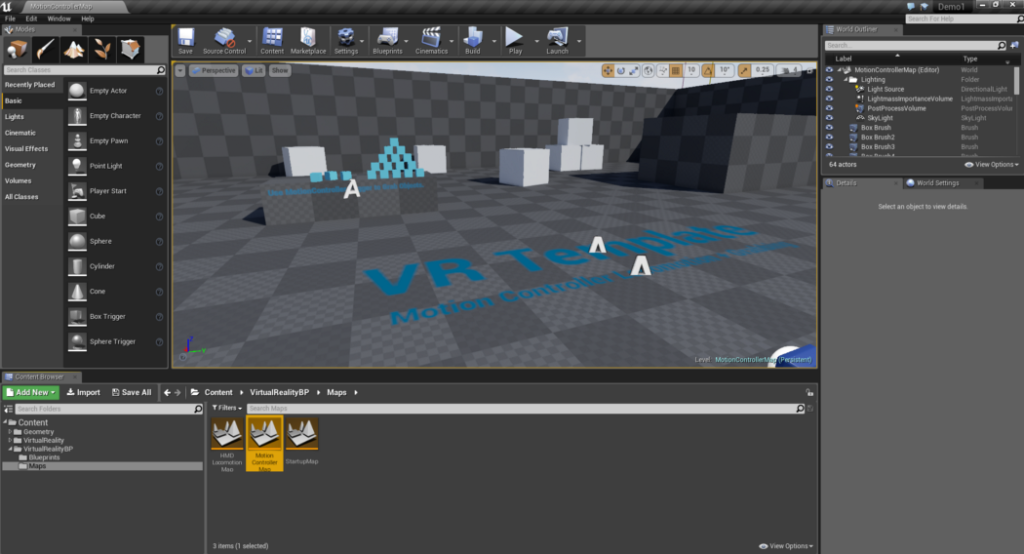
The process starts by opening the Unreal Engine and going to the New project tab. In the Blueprint section select Virtual Reality. In the project setup choose Desktop/console, Maximum Quality and No starter content, and in Location insert the path you want for the project.